Why do you blog? We all started for a reason – because we have to something to say, we wanted to share our knowledge with the world, or just to have an outlet to express yourself.
It’s not enough to just have ideas, you need to be able to know how to present it and wrap it in a bow, so your thoughts have a fighting chance to stand above the billion already out there.
To do so, you need to execute it in a coherent format, where it flows so well, so the reader naturally engages with it.
And to top it off, you need to have an appreciation of SEO, so your posts can be picked up by search engines, so they don’t disappear into obscurity forever.
None of this is easy, and I don’t have the solution to these problems, but I will teach you a method to write comprehensive posts, which if follow I guarantee will make everything you write over one thousand words.
In this post I will teach you how to write a 1000+ word blog post, and we will cover:
- The basic outline formula that will set you well on the way to write 1000 words in a logical, ordered format.
- An example from one of my own posts to show you how I’ve applied the outline.
- Tips that will improve the look of your post, making it look more professional and interesting for your reader.
Before we begin – why does it matter if your post is 1000+ words ? Let me explain…
Why 1000+ words?
You might wonder why you should aspire to write long posts – it’s established that you need at least 300 words for your words to rank on search engines, but longer posts of 1000+ words tend to do better.
Although longer posts fair better, they do become difficult to coordinate, and a common mistake is for bloggers to put in filler for the sake of it.
Without careful planning and editing posts can become confusing, uninspiring and dull.
To keep your ideas in a logical order, applying an outline is the best first step you can make to writing a good thousand word post.

The basic outline to a 1000 word post
Okay! So you have an idea for a blog post.
Before you start putting pen to paper, first write a simple outline with these words:
- Introduction
- Point 1
- Point 2
- Point 3
- Conclusion
Doing this will help you keep a structure, now what each section means…
Introduction:
Your introduction is essential. A 2022 study found that the average person spends 37 seconds reading a blog post.
That’s right 37 seconds! That is because most visitors will skim through content and your introduction is essential to set the tone.
Therefore your introduction is the first impression your reader will get from your blog post. Make sure to have a good hook, that will help them decide if your post is worth reading or not.
When writing an introduction use it as an opportunity to:
- Introduce the problem
- Offer why the post will provide the solution
- Add a bullet list providing highlights what the reader will learn.
Point 1, 2, 3:
These points are you would call the ‘body’, each one separated by a (h2) heading, all with a prupose to explore your topic.
Depending on what your post is about you may use each point in a particular way, but as a guide:
- Point 1: is useful to build into the subject matter, introducing readers to words or concepts they are not familiar with that you are going to refer to throughout the post.
- Point 2: used to bring further discussion into the subject, looking at personal experiences, or bringing counter arguments into consideration.
- Point 3: is when your post is reaching it’s end, this part offers the reader the solution, giving actionable advice.
Conclusion:
This is the closer – the conclusions purpose is to summarise what has been discussed, and come up with a final assessment on the topic.
Don’t use this section to bring new information to the table, though you may want to acknowledge any limitations where you feel discussion is required.
As the conclusion is a lasting impression, I try and finish on a soundbite that will leave a memorable lasting impression to the reader about the key lesson(s) learned.
One more thing you may also include is a call to action to the reader – whether it’s inviting them to share their thoughts in the comments or subscribe to a mailing list.
Bringing it all together:
Using the outline is a great way to flesh out your thoughts – you can populate sections with your ideas.
For anyone’s whose ever had an idea you’ll find it’s not consistent sometimes you:
- Start with a conclusion and have to work backwards.
- Have a cool introduction story, but have no idea what the point of the post will be.
- Have a few small ideas, but need a lot of work to flesh out something complete
…And other times you just think of something that works as a clever blog post title, and have to work out what you want to do with it!
Your outline will help you with the editing process allowing you to add, remove, edit and move to make your post the best it can be!

Applying the outline…
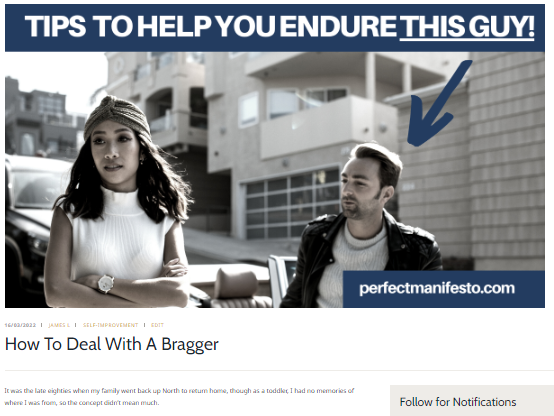
A good example how I’ve applied this outline, is in my post – How To Deal With A Bragger.
In this post I:
Use a personal story as my hook, to provide an introduction to the problem (being friends with a bragger and not knowing how to deal with them).
Provide a bullet list in the introduction that highlights what the post covers (“How do you deal with a bragger”).
“Why do people brag?” started as point 1, where I explore the problem. Here I introduce other people’s thoughts on the topic and my own ideas.
Point 2 looks at the wrong answers. Rather than offering up the solution I delve deeper into the topic to highlight bad ways to handle a bragger – this is a great relatable piece for the reader as we’ve all been there!
Point 3 provides the answer “Strategies you can incorporate”
The conclusion, comes in summarising the topic, and allows me to finish with the cool soundbite:
“Remember – we have the power to control how we react to someone who constantly brags, so when you next have to endure a bragger, turn the other cheek.
When you realise their claims are insignificant – you can focus on making your own life better.”
Going off the outline:
“But wait” I hear you say –
“I see from your example that you didn’t strictly follow your format!”
And you are correct observant reader! In my example, I actually had a Point 4 “The worst way to handle a bragger”
Although I’ve identified an outline to use, don’t let this impact your creative flow, add extra points if your post needs it – not everything works as a simple point 1, 2 and 3, and you could have posts that includes point 4, 5, 6, 7, 8, 9 etc (these are what you would consider a list post).
Use the outline, go off the outline, add extra hears (or sub-headers), just make sure it keeps flowing.
Here are some tips to make your 1000 post easier on the eye
The bigger the post, the more of a behemoth it becomes to read.
Aside from good writing, there are a few ways to make your blog post an easy read:
Write short paragraphs:
A large paragraph is overwhelming to your average viewer, and for mobile users everything looks 10x worse as they are browsing on a small screen.
When writing blog articles keep your paragraphs short – 3 lines max.

Use headers:
Header’s service two uses, they:
- Help search engines identify what your post is about.
- Make it easier for readers to scan your post.
Not sure where to put your headers? In the outline where you mark out points 1, 2 and 3 – rename these and make them your (h2) headers (and use ‘h3’ headers if the points get a bit meaty!).
Use images:
An image helps break your post up and can support the story of your post.
Use royalty free ones to avoid any lawsuits (yes, they even target small time bloggers), or create your own using free software like Canva.
Canva is a great route, it’s more time consuming, but it can be difficult finding stock images that are relevant, or look a bit silly taking away from the message of your post.
Make it stand out:
Using formatting options like bold, italics and underline can help emphasise certain words, and tools like WordPress have blocks offering the options to quotes, social media and video which really help make your ideas stand out.
Edit, edit, edit:
It goes without saying, you can never do enough editing.
It’s not just about picking up on spelling and grammar issues, putting fresh eyes on your work will help you spot more effective ways to phrase your content, or cut out the unnecessary dross that doesn’t add anything.
Conclusion
To write a 1000+ word blog post, it’s a good idea to write down a skeleton structure on a page to help you plan out and help with the flow of your content.
This starts with an introduction and ends with a conclusion, with at least three points making up the body to structure your idea.
Use this method for various post types, whether it’s answering a problem, or doing a more reflective piece.
This approach is super effective to get you writing 1000+ word posts – let me know how you get on when you try it.
Wishing you the best in your success
James @Perfect Manifesto
Copyright © 2023 James M.Lane perfectmanifesto.com
